
![]()
![]()
![]()
![]()
![]()
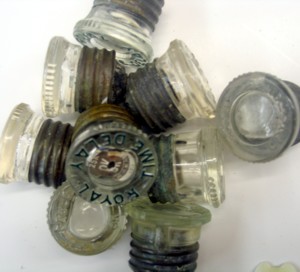
Is everything cracked on this thing?
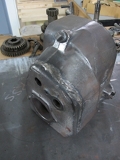
-Model AA transmission Repair- is your transmission crusted in old grease? Better dig in and check it out before you have a crack this big.... the good news is it can be fixed at home with tools most people have!
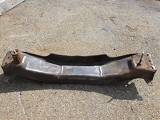
Front cross member repair, wish I had taken some before images before cutting.
Click on an image to view larger.(clicking twice will just open the small image agian)
 |
 |
||
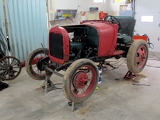
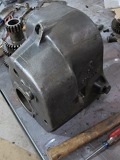
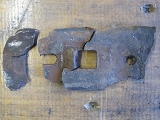
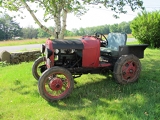
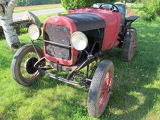
| 1928 ford Model A doodlebug with a severly cracked 1930 model AA truck transmission and rear end. I don't know how long it was broken but it likely broke due to the destroyed pilot bearing between the input shaft and the output shaft. When driving the transmission would sometimes lock up suddenly (ouch!) | Crack went nearly to the shift tower on both sides, I am sure most people would not save it. this of course is what the case looked like after hours of scrubbing. Man did it smell when the case hit the fire and the oil I couldn't clean out burnt out. |
Weld prep included drilling and doweling the crack to hopefully immobilize it during welding. The main gear shaft & reverse shaft was left in place even though the heating would likely have an adverse affect on temper. The ridgidity to the case during welding and cooling was more important here. | One of the big problems with welding cast iron is that the weld cracks as it cools to help with this I pre-heated the transmission. and kept the heat on during welding. welds were completed in ~1" sections and peened to help relieve stress. This was the first time I have welded cast with the correct rod and was the first time welding with a stick welder in well over a year. |
 |
 |
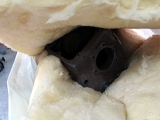
||
| Slowly cooling the transmission in a bat of insulation for about 2-3 hours. During the welding I tried to only do 1" or so in any one place at any one time. Additionally I peened the welds immediately after they hardened to help relieve internal stress -of course I had to remove flux too. | This is how it looked after the welding, I have done better looking welds but looking from the inside penetration was good as indicated by a subtle color change around the weld area. | Almost all back together. I did break though with a weld and had to do a fill at the area near the casting mark. It left some goobers in the case, but they were out of the way of any moving parts. | |
 |
 |
 |
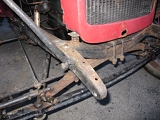 |
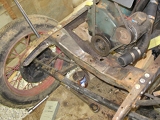
| I did not think to take any pictures before I started, but these were the chunks that were broke out when the crossmember was removed. To make room for new metal I made a straight cut perpendicular to the cross memeber with my bandsaw beyond the cracks then ground the sides straight to fit the new piece | Fresh welds cooling in the sun! The new plate is .25", somewhat thicker than the original. I suppose on a restored car you would grind the welds and they would not even show with some paint. button head bolts would look similar to rivets after assemby but I just used bolts | The cross member bolted back in place, the frame seems to be a 28' and the cross member seems to be newer. The engine mounting bracket would not line up with the hole in the crossmember (which had been reamed out some what). I had to make some spacer blocks to make everything fit somewhat correctly | Yes, I know the spring is in the wrong place, but the engine sits a little high in the front because of the incorrect cross member this causes the fan to interfere with the radiator hose at the top. |
 |
 |